Setting Up Sessions
Last updated June 10, 2021

Session Details – Basic
Once you’ve logged into the Backoffice, navigate to the Events tab and click into the desired event. Within the event, click the Sessions tab, then the Add New Session button.
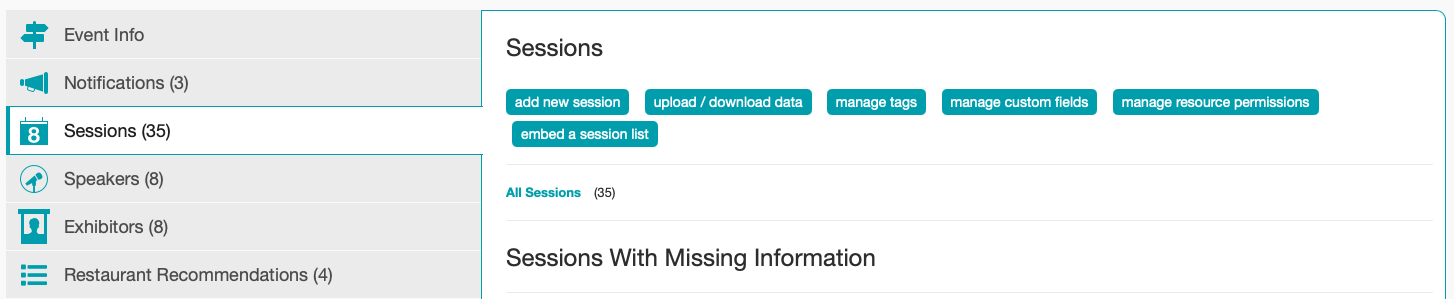
First, you can add in the basic information to your session such as Name, Start Date, and both the Start Time and End Time. Location and custom values are optional, but can be added if desired. You can also add a session image that would appear on the welcome page under the section, Upcoming Sessions. We also have the ability to tag sessions if required. Additionally, you can add a session description which is the last field on the page. These are some of the basic settings that you can add to your sessions. Next, we will cover some of the more advanced settings.
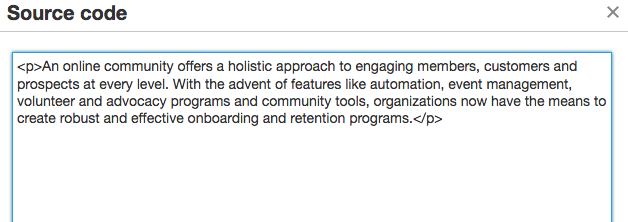
Session Description is where you can add all of the descriptive content about a session. There is no content limit. The Session Descriptions can be uploaded in bulk or created individually and edited at any time.
PRO TIP: Source Code allows you to include styling directly into the Session Description using HTML Code. Supported HTML tags for the session description are:
- Bold <strong></strong> or <b></b>
- Italic <em></em> or <i></i>
- Underline <u></u>
- Line break <br/>
- Paragraph <p></p>
Sessions Details – Advanced
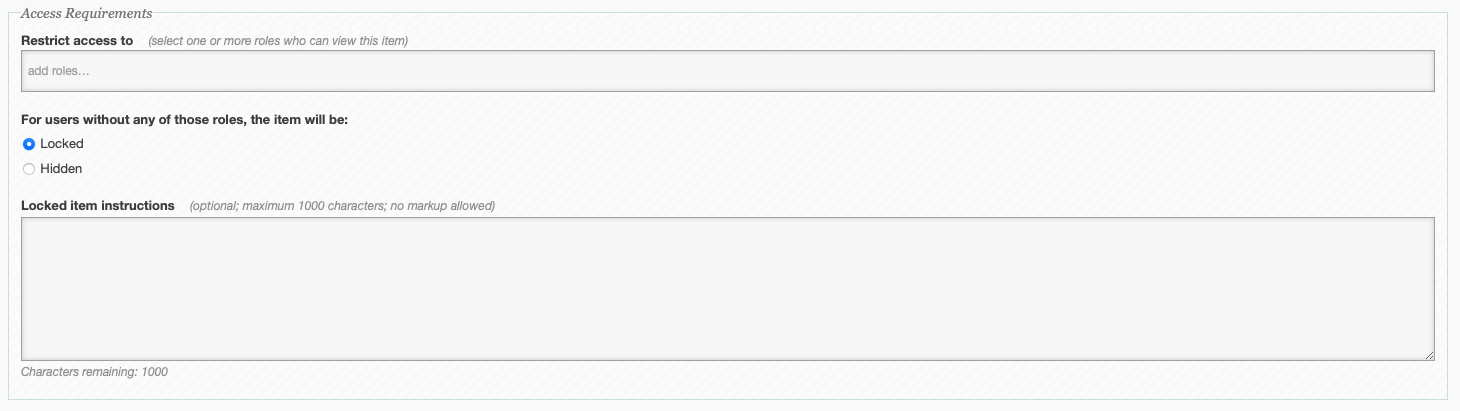
Under the Access Requirements section, you are able to grant access to sessions based off of an attendee’s role. For example, if you are offering either a one or two day pass, you can create a role for attendees to either see sessions for just one day, or both days based on their ticket type.
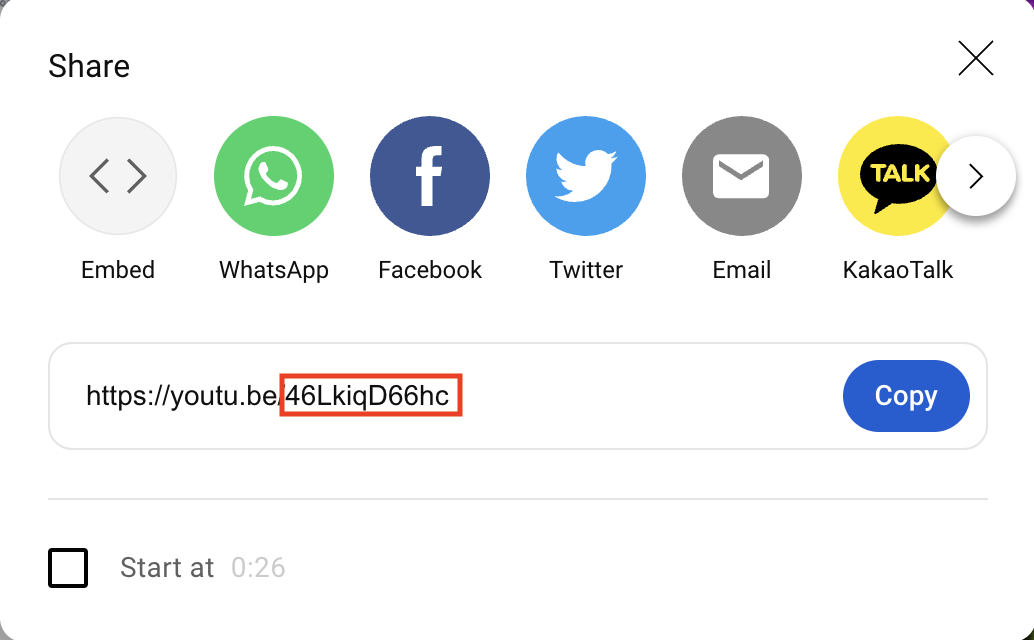
Next is the Video Content section. These settings will be relevant if you will be presenting session content to your attendees. You have the option to embed either a prerecorded video or a live stream video through the Vimeo and YouTube platform. These setting will require a Vimeo license, so if you have any questions feel free to contact your Product Specialist. All you will need to carry over your Vimeo content into the Results Direct platform is either the Video ID if it is a recording, or the Live Event ID if the video will be live streamed. For Youtube, you can identify the video ID you will need to add to the session with the example below:
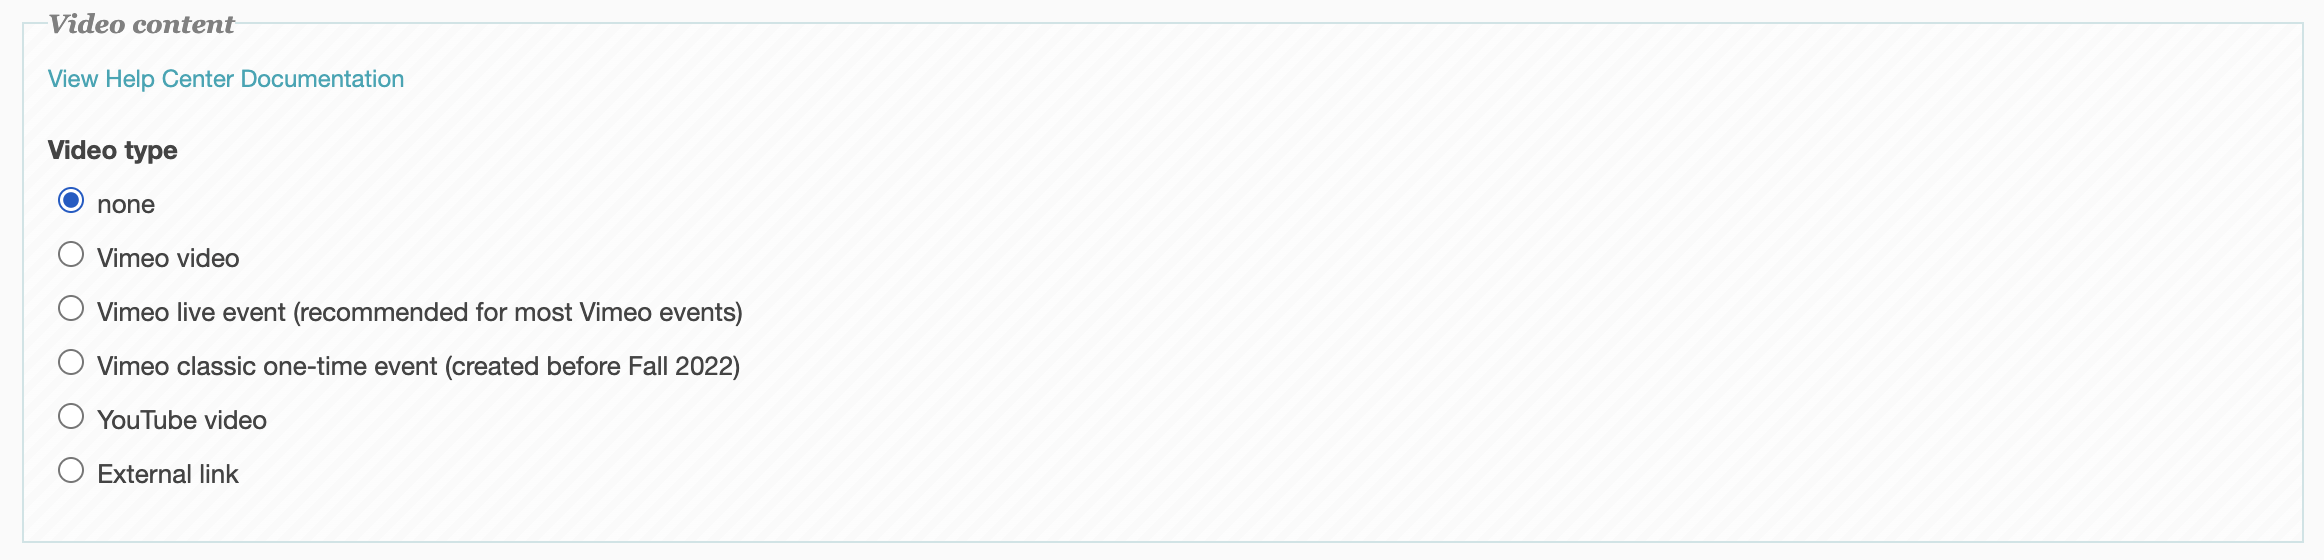
In addition, if you are not going to be embedding content into the platform, you have the option to provide an External Link. This means that you can input a link from your Zoom, Go To Meeting, Teams, etc within the Video Link field. You are also able to add a title to the external link within the Label field. Once you have entered in all necessary settings, be sure to click the Save button in the top right hand corner of the page.
Associating Speakers to Your Session
After adding the initial settings for your session, we have a few additional options as well. If you have a speaker that will be leading your session, you are able to associate either one or more speakers to each session by clicking the Add button next to Associated Speakers. This will pull a list of all of the speakers you’ve added to the event. From there, you can click on their name to associate them to the session. Very similarly, we can associate exhibitors and sponsors to a session as well.
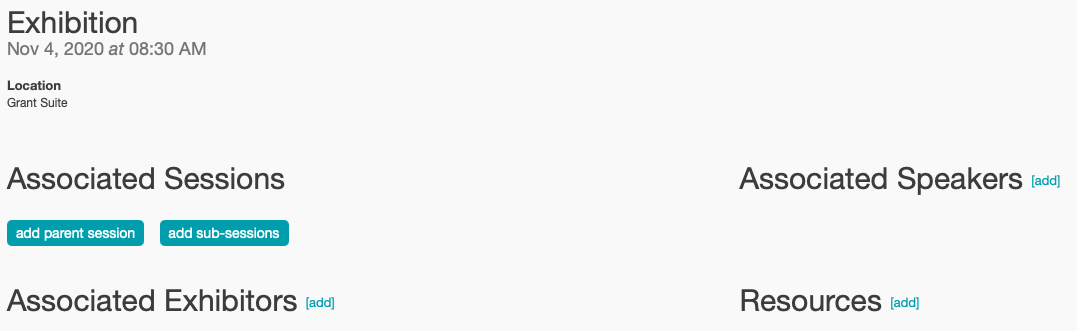
Adding Resources to a Session
You also have the ability to add different Resources to the session.This could include a Powerpoint presentation or other helpful documents that pertain to the session.You can add various resources by clicking the Add button next to Resources. First, add a name for your document. If you will be adding linked content, you can add the URL. If you are uploading a file, you can simply click Upload File. From there, go ahead and click the Create button.
We also have the ability to associate sessions to one another. For example, if you have session tracks that are happening concurrently, you can click the Add Sub-Sessions button.
Uploading Sessions
The other way to add sessions would be through a bulk upload. To do so, navigate to the Sessions tab and click the Upload/Download Data button.

Choose the Download for Spreadsheets option, which will populate a template for an Excel spreadsheet. This is where you will populate all session information. After completing this spreadsheet, save it to your computer for easy access. Navigate to the Choose File button and find your spreadsheet. From there, click the Upload File button which will bulk upload all sessions into the Backoffice.

If you have any additional questions regarding session setup, Vimeo options or the advanced settings, please contact our support team at support@rdmobile.com.
RD Mobile FAQ
Got a quick question? Check out RD Mobile's FAQ page for a quick answer. A collection of our most common client questions all in one place!
- Can I Copy and Paste an Event?
- What images can I upload to brand my app?
- How can I make changes to my app store listing?
- How often can I update event content in the apps?
- Registrant Profile vs. Participant Profile
- Do unpublished events automatically reflect changes I’ve made to event content?
- Are there differences in how Engagefully looks or behaves across different devices?
- How soon will attendees see the updated content on their devices?
- Can attendees export their sessions to their device calendar?
- Will Engagefully EVENTS work when the attendee doesn’t have Internet connectivity?
- Is it possible for attendees to manually fetch the most recent content?
- Does RD Mobile have surveys and polls?
- How will the custom values appear in the app?
- Where will ads show up?
- What is the difference between the Attendee Roster and Attendee Social Profiles?
- What is RSS?
- How do I remove flagged posts, photos, and comments from the app?
- What is the Personalized Dashboard?
- What different content can display in the Dashboard?
Get Started With Conversations
RD Mobile's Conversations provides a space for members, event participants, committees, and groups to connect and engage. Conversations is available as an add-on to RD Mobile’s Engagefully platforms.
About RD Products
RD Mobile’s industry-leading Engagefully & Engagefully EVENTS apps & platforms power year-round member engagement as well as in-person, hybrid/blended & virtual events - on both mobile & desktop devices.
Get Started With Year-Round Content
Ready to set up your year-round content on the Engagefully platform? Follow these steps to kickstart your engagement.
On-Site Tools & Support
This is a collection of tools, tips and best practices to support your participants leading up to and during your event.
Publish & Promote Your Event
Your event is ready to go, now it's time start engaging participants.
- How to Publish Your Event
- Invitation Email
- Follow-Up Emails
- Email Templates
- App Marketing Resource - How-To Guides
- Increasing App Downloads & Engagement - Marketing Campaign
- App Marketing Resource - Digital Business Card Exchange Promo Image
- App Marketing Resource - Website Samples
- App Marketing Resource - Spinner Samples
Add Basic Event Content
Ready to start adding content to your new event? Learn the basics here in this step-by-step guide.
- How do I create a Notification?
- Setting Up Sessions
- Setting Up Speakers
- How to Reorder Speakers and Designate Speaker Roles
- Setting Up Exhibitors
- How do I create tags for my Event?
- How to Add Registrants
- Registrant Profile vs. Participant Profile
- How to Manage Content In Bulk
- How do I enable and manage the event Dashboard?
- Add a New Menu Item
- Add a Map
- Setting Up Ads
Advanced Event Features
Want to supercharge your event? Browse through this collection of advanced features to determine what your event needs to take it to the next level.
- Event Roles
- How to Reorder Speakers and Designate Speaker Roles
- How to Create Exhibitor Booth Staff, Moderators, and Sponsor Representatives Using Custom Content.
- How to Create Custom Content
- What are Custom Labels used for?
- Event Integrations FAQ
- Embed Sessions on Your Web Site
- Embed Speaker Details on Your Website
- Embed Exhibitor Lists on Your Web Site
- How to Add Surveys, Evaluations & Polls
- Exhibitor Management Portal
- QR Code and Virtual Session Check-In
- Digital Business Card Exchange
- Setting Up Gamification
- Arranged Appointments
- Embed YouTube Content within Sessions
- Embed Vimeo Video Content within Sessions
Create a New Event
Ready to create a new event on the Engagefully & Engagefully EVENTS (formally Eventsential) platform? This step-by-step guide will walk you through creating and configuring a new event.